Another drip last week from the Red One, which suggested there was no point in waiting any longer to do the octopus. Having read all I could find on this forum the views seemed to be either 'oh no - not the octopus!' or 'what's the problem?'
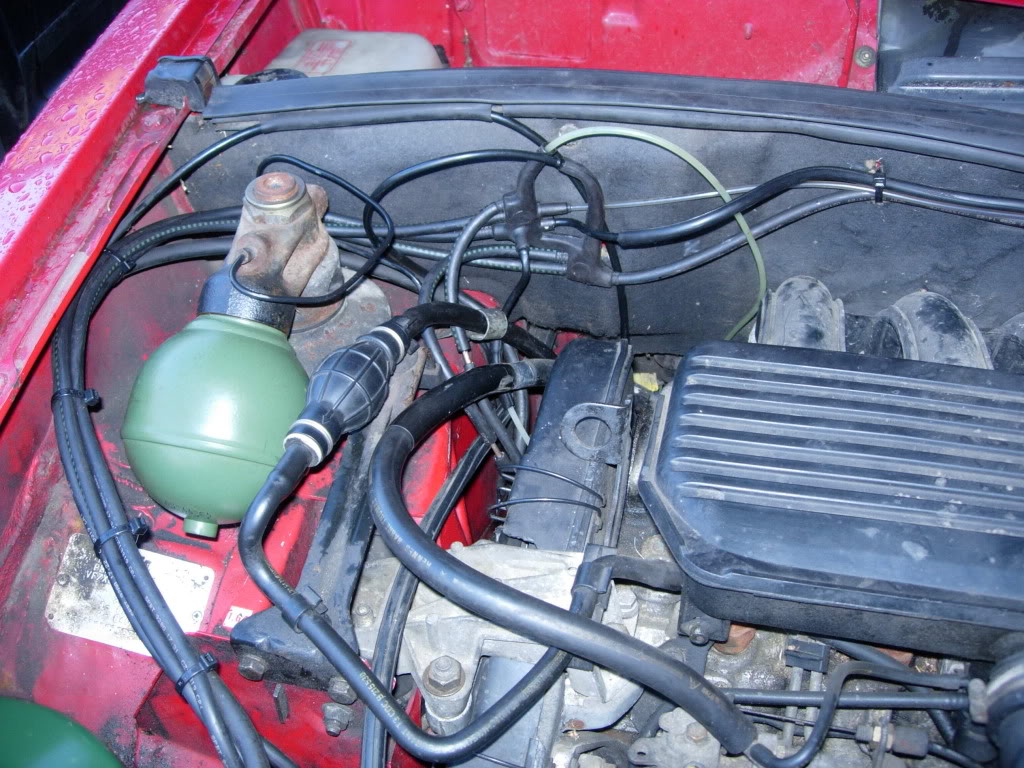
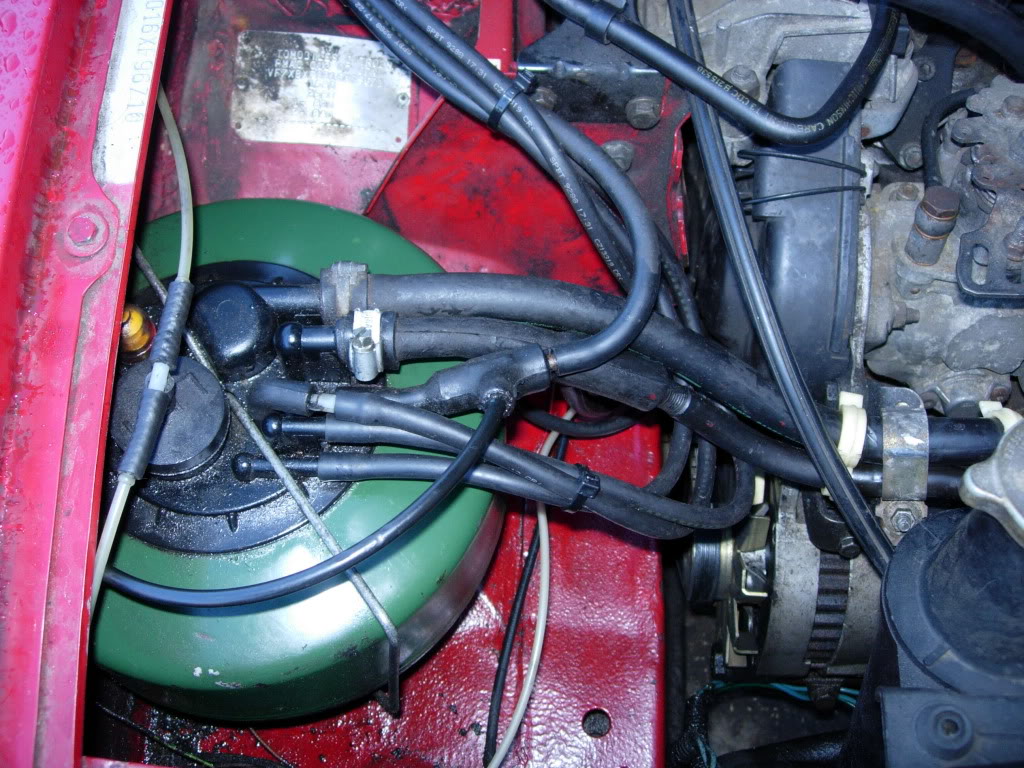
I originally wanted to bulkhead mount it (as someone did earlier this year) but veered between 'extra joints to leak' to 'accessability' etc., but in the end I thought it had to be worth it. I was surprised how many of you didn't seem to know what the pod was, where it was or what it looks like, so Andy has taken some pics which I daresay will appear with this thread as soon as he reads this. The thing is flat, all rubber, isn't bolted to anything and lies flat on the chassis crossmember. It is lodged under the front height corrector and the only way to withdraw it sensibly is forward and towards the wheel. Someone reckoned the driveshaft has to come out; it doesn't. As you need the car on ramps to get underneath you want yer wheels on. Getting the old one out was simply a question of pulling the little shit out bit by bit with pliers, after disconnecting the hoses as you go. This convinced me that never again would I go through that.....filthy job. The new octopus went on the bulkhead as you can see on the picture, and using about 3 metres of 3mm tubing from Pleiades (still going and nice helpful guys) I bridged the gaps using copper pipe offcuts which were a snug push fit to link the extra piping. The two sizes of plastic return piping needed to be extended of course and I robbed the scrappy again, but anything would do. Job done. Sounds simple but in fact I had the usual first-timer problems. Next time, with the suspension on 'high' I'll break the joints on the strut pipes before anything else, then they'll just pull off. I'll also have a much longer pair of long-nose pliers, at least a foot long; the shorter ones means you are gripping them just where the strut and axle gubbins get in the way.
The octopus is mounted on the bulkhead liner as it weighs nowt so no need to drill holes in metal. The copper bridges don't leak; if they did a smear of superglue when fitting would sort that. As far as 'where does everything go?' the colour diagram available on this forum is all I needed
As per my recent post I found fitting the new pipes on the height corrector the worst job; dipping the new pipes in hot water and pre-stretching them using a tapered punch helps a lot, and decent pliers are a must.
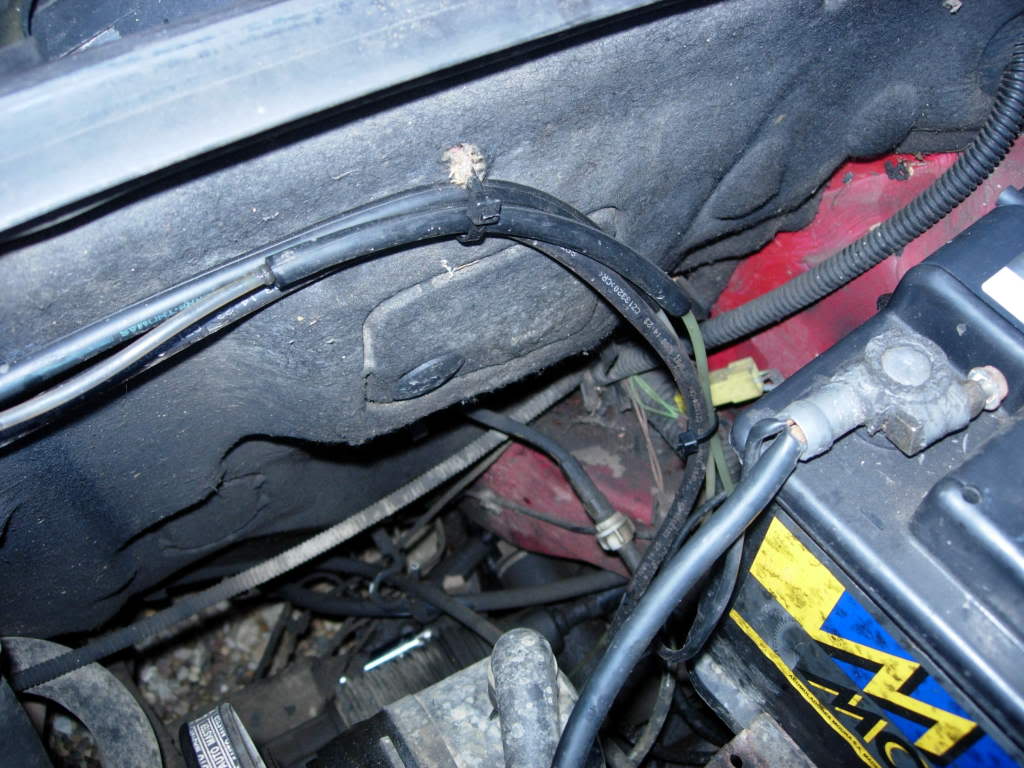
On the subject of pipes, don't forget that every other pipe is probably the same age so while you are at it, change the second return pipe on the height corrector, which goes up to the reservoir, as well. Mine was on the point of failure and actually broke off the small triple block by the reservoir when I handled it; another copper bridge solved that one.
Like I said, everything has been roadtested and Citrobiced. From now on, any drips can be traced the the individual pipe concerned and replaced if necessary with having to prat around wondering whether the latest puddle is the actual octopus or not. Definitely worth doing, plus I now know my way around the hydraulics a bit better.
octopus -job done, no problems.
-
tim
- BXpert
- Posts: 324
- Joined: Thu Apr 22, 2010 5:51 pm
- Location: somerset
- My Cars: 2 1992 BX TXD estates
- x 1
-
Mothman

-
BX Meteor

- BXpert
- Posts: 985
- Joined: Thu Mar 31, 2011 9:04 pm
- x 1
-
toddao

- BXpat
- Posts: 2833
- Joined: Fri Jan 12, 2007 5:01 pm
- Location: The Hegau
-
ken newbold

- Over 2k
- Posts: 4408
- Joined: Sun Aug 14, 2005 10:53 pm
- x 5
-
sdelasal
- BXpert
- Posts: 511
- Joined: Mon Apr 06, 2009 8:45 am
- Location: Chelmsford, Essex
-
rmattila

- BXpert
- Posts: 412
- Joined: Sat Dec 25, 2010 5:00 pm
- Location: Finland
Yes:BX Meteor wrote: (i) would it be possible to cut the octopus into its separate systems (I think it comprises of 3 separate systems) ??
http://www.rmattila.com/images/remontit ... us_change/
Speechless quad lying flat on his bed, communicating by moving eyes.
BX Van 1.9D -90 Gone.
BX Van 16S -90 For sale.
BX Van 1.9D -90 (Earned!) Gone.
BX Break 1.9D -90 (officially a "5 seat van" since 2005) Waiting to be towed to a new home.
BX Van 1.9D -90 Gone.
BX Van 16S -90 For sale.
BX Van 1.9D -90 (Earned!) Gone.
BX Break 1.9D -90 (officially a "5 seat van" since 2005) Waiting to be towed to a new home.
-
Mothman
Yes bud, i see it can be done but your way of doing it is so very complex for us mere grunts.
Most of us aint engineers and surely pulling the lot out and relacing the whole thing is the way to go. Ok, if there aint one on the shelf, a small wait till one is obtained isnt really a problem.
I could never do it your way, too much like hard work for me, bad enough following Tims instructions, especially if its all stuffed back from whence it came with bugger all access.
And actually, you havnt answered the question if the octopus can be cut. You have made a complete replacement which isnt the same.
I think the octopus replacement needs to be made as simple as possible. Ime certainly up for a bulkhead mounted jobbie, so much easier to get at any future leaks should the rest of the motor last that long!! .
.
Your pics are great however but i couldnt do it.
Andy
Most of us aint engineers and surely pulling the lot out and relacing the whole thing is the way to go. Ok, if there aint one on the shelf, a small wait till one is obtained isnt really a problem.
I could never do it your way, too much like hard work for me, bad enough following Tims instructions, especially if its all stuffed back from whence it came with bugger all access.
And actually, you havnt answered the question if the octopus can be cut. You have made a complete replacement which isnt the same.
I think the octopus replacement needs to be made as simple as possible. Ime certainly up for a bulkhead mounted jobbie, so much easier to get at any future leaks should the rest of the motor last that long!!
Your pics are great however but i couldnt do it.
Andy
-
Defender110
- Over 2k
- Posts: 5918
- Joined: Wed Dec 16, 2009 8:02 pm
- Location: Harwood, Bolton
- My Cars: Land Rover Discovery Series 1 200tdi 3 door
Land Rover Discovery Series 2 Facelift TD5
2020 Fiat Panda cross 4x4 twin air. - x 27
I don't understand the concerns with the octopus, the original lasts 15 years + so all in all it is a very reliable bit of kit in it's original form so why tamper?
Kevan
1997 Mercedes C230 W202
2003 Land Rover Discovery Series 2 Facelift TD5 - Daily driver / hobby days and camping.
1993 Land Rover Discovery 200tdi Series 1 3 door - in need of TLC
2020 Fiat Panda 4x4 Cross Twin Air.
1997 Mercedes C230 W202
2003 Land Rover Discovery Series 2 Facelift TD5 - Daily driver / hobby days and camping.
1993 Land Rover Discovery 200tdi Series 1 3 door - in need of TLC
2020 Fiat Panda 4x4 Cross Twin Air.
-
rmattila
- BXpert
- Posts: 412
- Joined: Sat Dec 25, 2010 5:00 pm
- Location: Finland
As I see it, there are actually three somewhat separate issues:

- Can the octopus replacement be made from three parts?
- Can it be made by splitting the original octopus in three?
- What is the optimal location for the three-part octopus?
Last edited by rmattila on Wed Dec 21, 2011 9:28 pm, edited 1 time in total.
Speechless quad lying flat on his bed, communicating by moving eyes.
BX Van 1.9D -90 Gone.
BX Van 16S -90 For sale.
BX Van 1.9D -90 (Earned!) Gone.
BX Break 1.9D -90 (officially a "5 seat van" since 2005) Waiting to be towed to a new home.
BX Van 1.9D -90 Gone.
BX Van 16S -90 For sale.
BX Van 1.9D -90 (Earned!) Gone.
BX Break 1.9D -90 (officially a "5 seat van" since 2005) Waiting to be towed to a new home.