C'est Bleriot - 1987 17RD Hatchback

Tell us about life with your BX, or indeed life in general!
Post Reply
User avatar
vulgalour
BXpert
Posts: 553
Joined: Mon Feb 04, 2013 11:30 am
Location: Kent
My Cars: 1980 Austin Princess 1.7 HL
1987 Citroen BX 17RD
x 105

Re: C'est Bleriot - 1987 17RD Hatchback

Post by vulgalour »

Tiny BX update for you. I wasn't feeling up to doing welding today, I'm saving that for tomorrow. Instead, I got one of the wheel trims cleaned back and with a fresh coat of paint on. Rather than using sandpaper, I'm using thinners and plastic bristle brushes with regular wiping off with paper towel. I've used this technique before to good effect on plastics and as long as you don't leave the thinners on too long and rinse everything down with water when you're done, it doesn't do any harm to the plastic and leaves a nice clean surface to paint afterwards. It is quite a smelly process, so worth doing in a well ventilated area, and be patient since it's not a job that will whizz all the paint off in one go if there's been several repaints as there has on these.

The results do rather speak for themselves. The plastic primer I'm using is ever so slightly darker than regular grey primer which brings the silver I'm using that bit closer to the factory shade and knocks off that too-new look of bright silver wheel paint without going as dark as 'steel' or 'anthracite' finishes. I'm being a bit picky about these wheels, get the wheels right on a car and it's amazing what other cosmetic issues folks will overlook. The steel wheels I may have to do with the tyres mounted since I haven't a spare set of wheels to swap in, I'll cross that particular bridge when I come to it.

Image
User avatar
panky
BXpert
Posts: 408
Joined: Mon Jan 22, 2018 4:44 pm
Location: Widnes
My Cars: 1985 BX 19 GT (DKK), 1971 Morris Minor Traveller, 1971 Commer Auto-Sleeper, 1969 Commer Jennings Roadranger.
'88 BX GTi (a long time ago)
x 78

Re: C'est Bleriot - 1987 17RD Hatchback

Post by panky »

Looks brand new but, as you say, doesn't jump out at you, great job 8)
Image
User avatar
vulgalour
BXpert
Posts: 553
Joined: Mon Feb 04, 2013 11:30 am
Location: Kent
My Cars: 1980 Austin Princess 1.7 HL
1987 Citroen BX 17RD
x 105

Re: C'est Bleriot - 1987 17RD Hatchback

Post by vulgalour »

Thank you. I'm looking forward to getting the finished set back on the car.
---

Right then, a proper update this time. My goal was to get the passenger inner wing finished today, no matter how long it took me. Then, naturally, the welding wire ran out just as I was starting to get the most awkward repair piece stitched in.
Image

Luckily, that happened at the point it was sensible to have a break for lunch, so Mike went and got a new reel of wire - the one in the machine had lasted us for a good four years, so there's no complaints here - and by the time he got back lunch was consumed and I could crack on afresh. The job went fairly smoothly, all told. I do wish my welding looked nicer than it does, it's slowly improving as I do more, I just wish I had the knack of making it consistent. I'll get there eventually.

I didn't take any progress pictures of the welding, it was just one of those jobs I got on and did. The inner wing near the suspension turret needed a square letting in before the outer panel was replaced, and I made sure to douse it all in as much protection as I could as I built it up. Once I was happy that all the welding that needed to be done was done, I went around all the seams and welds with seam sealer, keeping it slightly tidier in the engine bay by using a bit of masking tape to keep the edges tidy, being sure to peel it off before the sealant had cured.

Image

Image

Image

Image

Image

The slot for the bumper was a little tricky to build, I don't realy have a suitable small tool to cut it out. I found that a combination of the bench grinder and hand files got me a good enough shape to mirror the other side which is intact. I made sure to put a second bumper bracket plate on as a strengthener, as seen on the other side. With that all done, and the sealant ready enough, I went over everything with some fresh Alpine White. I didn't have time for lacquer or underseal today, that will come later. I need to clean out the rest of the inner arch this side to be absolutely certain no more welding is required before finishing off the paint and applying weather protection. After that, I can rebuild this side and put the wiring back properly again.

Image

Image

Image

Image

Image

The harsh lighting is not at all flattering. It doesn't matter, these repairs will be barely visible once everything is back in its proper place and the important thing is that the rust is now gone on this side. The other side should be much easier because the shapes I need to make are much simpler and I shan't be working in the dark as I have for most of the welding I've done so far. Not sure when I'll next do work on the BX, I have a moderately busy week ahead and possibly a busy weekend too. We shall see.
Warren Nel
Confirmed BX'er
Posts: 49
Joined: Thu Dec 20, 2018 2:17 pm
Location: Tonbridge
My Cars: Citroën C4 Grand Picasso

Previous cars
Peugeot 806 TD
Peugeot 309 TD
Ford Fiesta 1.1
Mazda 323 mk1
Nissan Micra mk1
x 2
Contact:

Re: C'est Bleriot - 1987 17RD Hatchback

Post by Warren Nel »

A very enjoyable read. Thanks for sharing this.
User avatar
vulgalour
BXpert
Posts: 553
Joined: Mon Feb 04, 2013 11:30 am
Location: Kent
My Cars: 1980 Austin Princess 1.7 HL
1987 Citroen BX 17RD
x 105

Re: C'est Bleriot - 1987 17RD Hatchback

Post by vulgalour »

You're very welcome. I do hope these threads are informative and to some degree entertaining.
---

Had a few free hours today, plenty of time to get that repaired inner wing cleaned up, painted, and undersealed. The cleaning up bit went really well right up until I found some more rust to repair. So I changed tack, and instead decided to repair the rust that was there instead, starting with the closing panel between the headlights and crossmember. This was difficult because I couldn't get any tools in to make a really tidy job so I have to admit I cleaned up the rust, chopped back what I could, and then overplated it instead. The other option would have been to cut the crossmember front face down and weld it back on and I didn't really want to go that extreme on this repair. It's not seen so after welding some really ugly blobs I smothered the whole thing in paint and sealant on both sides to hopefully keep the rust at bay for a good while longer. It's all hidden by the bumper too, so the finish here is less vital than in other areas.
Image

Image

On cleaning out the arch, the bit under the washer bottle I thought was solid turned out not to be. It has indeed already been repaired, the problem was the metal to one side of the repair had rotted out, possibly in part because the drain hole wasn't as clear as I thought it was. Luckily, I had access to a sort of long thin wire brush attachment that was exactly the right size to clean the drain hole out. Again, fairly ugly welding on top of ugly welding in an area I simply don't have the right sort of tools to clean up so it got a good smear of goop to keep it presentable and weather proof. As with the repair above, this area is never seen, so it needn't be pretty.
Image

Image

Image

Image

Then it was time to tackle the remaining repairs required. When I started cleaning the arch out what I thought had been just cracked underseal ended up being rot and I needed to cut a long thin strip out, clean everything up, and rebuild it. This has been repaired before, it just seems this bottom edge had blown on the seam. There was also a small spot that opened up when I was cleaning up the washer bottle area, right between the big repair I'd done, and an older small repair, so a square had to be let in there too.
Image

Image

Image

I had enough time left to get it all seam sealed and a splosh of white paint on. It's now ready for the work I went in to do at the start of the day, so at least that gives me something other than welding to do this weekend.
Image

While I was doing all this I noticed the towing eye was bent.
Image

So I went to straighten it and...
Image

Super. That'll be a bit more rust to remove and repair then. All the welding is these annoying little squares on edges, none of it takes particularly long to do individually, it's just a lot of faff. Still, I am glad I decided to deal with this now and nip these problems in the bud. The car is far from rotbox status, which is good, it's just a little tedious to sort through.
User avatar
Jaba
1K Away
Posts: 1893
Joined: Tue Jul 05, 2005 7:54 am
Location: Usually in the garage
My Cars: BX GTi, C3 Auto
x 80

Re: C'est Bleriot - 1987 17RD Hatchback

Post by Jaba »

Great resto job. Keep the updates coming.
The Joy of BX with just one Citroën BX to my name now. Will I sing Bye Bye to my GTI or will it be Till death us do part.
User avatar
vulgalour
BXpert
Posts: 553
Joined: Mon Feb 04, 2013 11:30 am
Location: Kent
My Cars: 1980 Austin Princess 1.7 HL
1987 Citroen BX 17RD
x 105

Re: C'est Bleriot - 1987 17RD Hatchback

Post by vulgalour »

Will do!

---

I had some free time today to get in and do some work on the BX. Just as well really, as I was finishing up I was starting to feel decidedly run down and now I seem to have some sort of Generic Illness, which is a bit annoying. Anyway, what did I get up to? Did the easy stuff first and refitted the relays and tidied the wiring in the front corner. There was a loose relay kicking about that doesn't go anywhere and rattles so I suspect that was a broken one that got replaced and forgotten about since it matches the other relays fitted to the inner wing.
Image

Got the whole of the inner wing undersealed. I made a small mistake by forgetting the wing rail portion of this is visible when the outer wing is fitted, so I'll have to do a little cleaning up of that later. I was just going to go over the bits that I'd worked on and ended up doing the whole inner wing instead just because it looks smarter all in one finish. Paid special attention to the bit under the nose since that area seems particularly prone to rust and did the shelf that I'd repaired to mirror the other side that's still solid.
Image

Image

Image

In a belt and braces approach I did the inside of the outer wing as well after I'd sorted out the rust blemishes on the edges. BXs don't seem to suffer from rotten front wings from what I've seen so this probably wasn't necessary.
Image

I'm glad I spent the time remaking the arch return lip and the little tab as both of these are needed to fix the arch liner in place. The liner clips onto the arch lip and a bolt goes through the wing and liner into the tab. The fixings for the lower portion of the arch liner had disappeared (perhaps they weren't there when I removed the liner?) so I drilled some holes to accept some button-head screws that I've used for this sort job before with good effect.
Image

Washer bottle on this side was also reinstated, which was very easy to do.
Image

I didn't have to modify the wheel brace to get it in the cubby, I just had to figure out the specific way that you put it in the space, so that saved me a job and it's nice to see it in its proper place.
Image

Finally, the outer wing, headlight, and indicator was fitted. I spent a bit of time fiddling with alignment to get things where they should be. Everything is very easy to assemble and the car is now looking much more like a car again.
Image
User avatar
TizzyD
BXpert
Posts: 537
Joined: Fri Jun 01, 2012 10:36 pm
Location: Bedfordshire
x 10

Re: C'est Bleriot - 1987 17RD Hatchback

Post by TizzyD »

This is great! Keep up the brilliant work :)
'02 Clio Dynamique 1.2 16v - 92K - Sold
'09 Yamaha YBR 125 - 1100 miles
'93 Bx 17 TZD Turbo - 240K - The Aubergine

Image
User avatar
vulgalour
BXpert
Posts: 553
Joined: Mon Feb 04, 2013 11:30 am
Location: Kent
My Cars: 1980 Austin Princess 1.7 HL
1987 Citroen BX 17RD
x 105

Re: C'est Bleriot - 1987 17RD Hatchback

Post by vulgalour »

I will, and I am. Here's another update for you :D

---

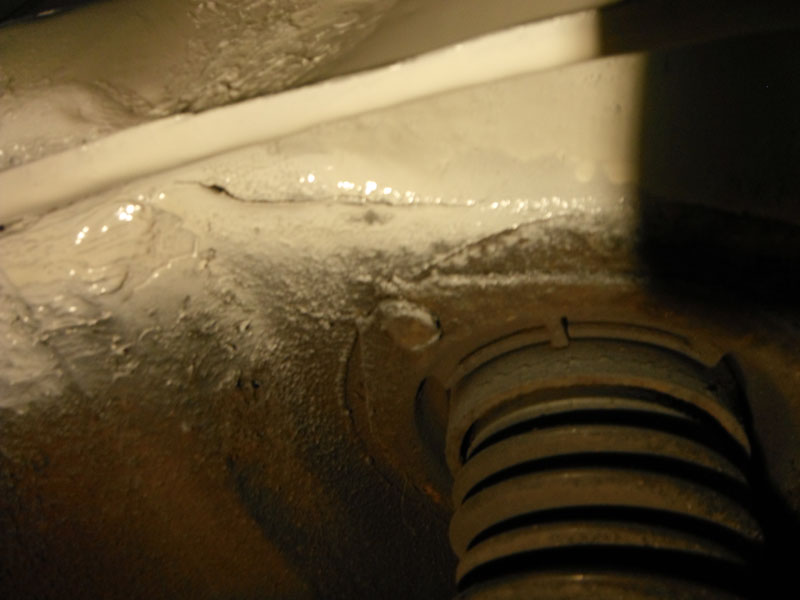
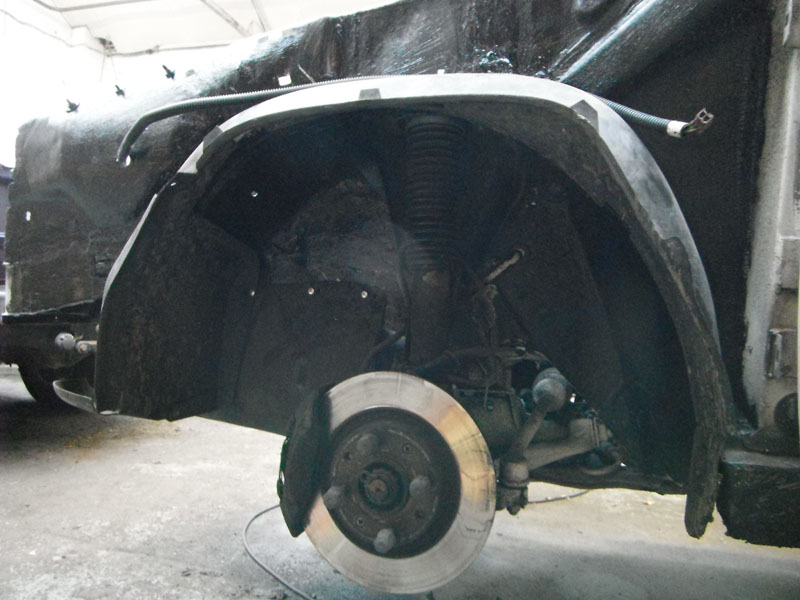
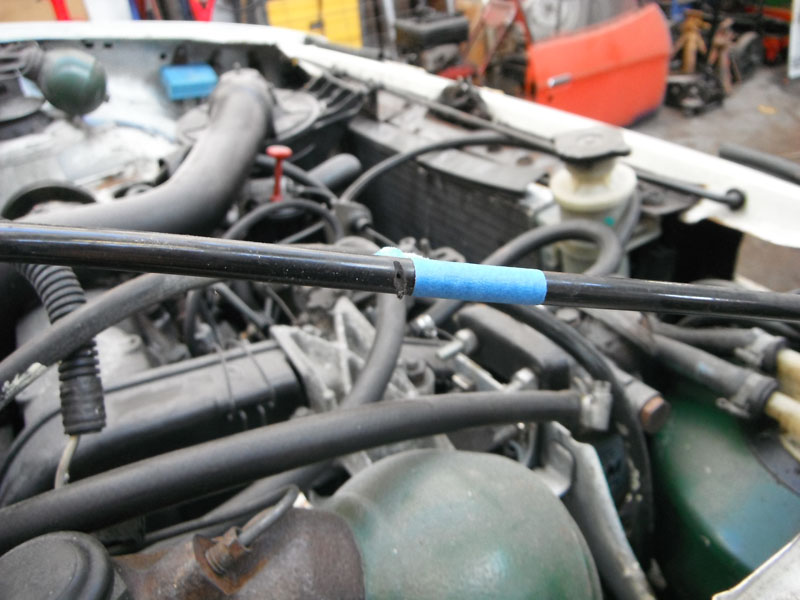
I have had a productive day off, even with a lazy start to my day. Didn't start fantastically well when I managed to nick a plastic LHM pipe, I assume this is low pressure so I can probably put a splice or joiner in it with no ill effect. My own fault this one, I thought I'd moved everything out of the way and hadn't. I put some blue tape on it to remind me that it needs sorting as this is the sort of thing I'm likely to forget about otherwise and be a nuisance to find when the car is running.
Image

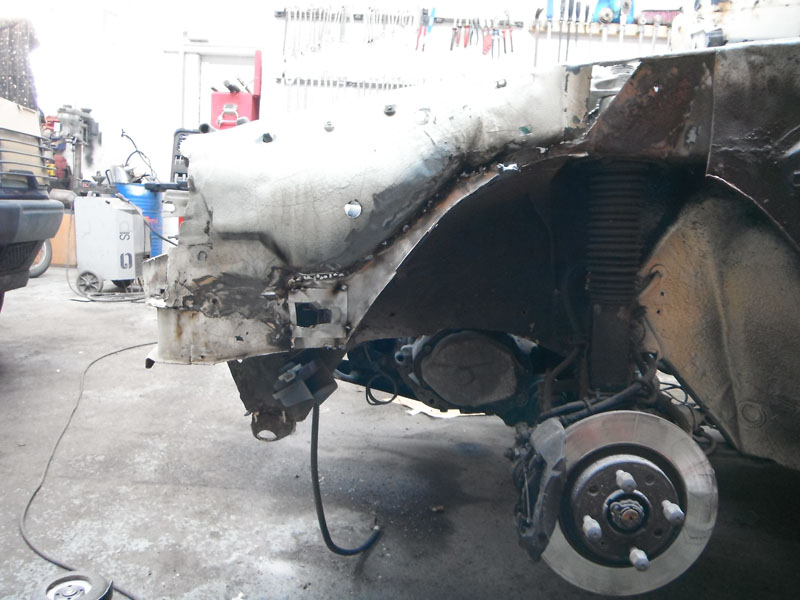
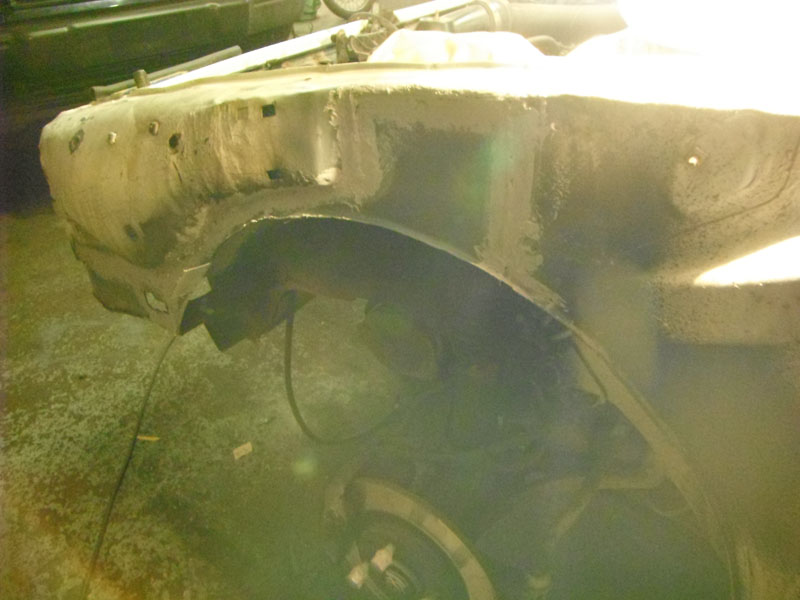
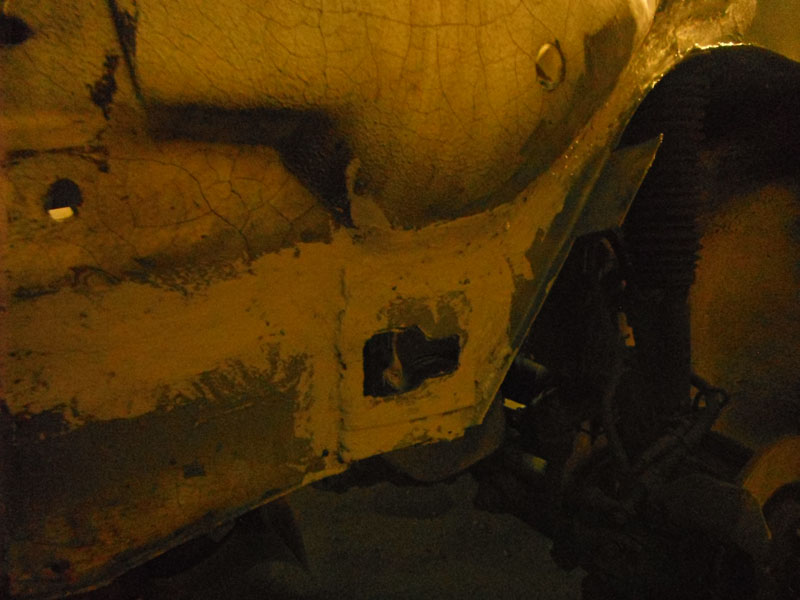
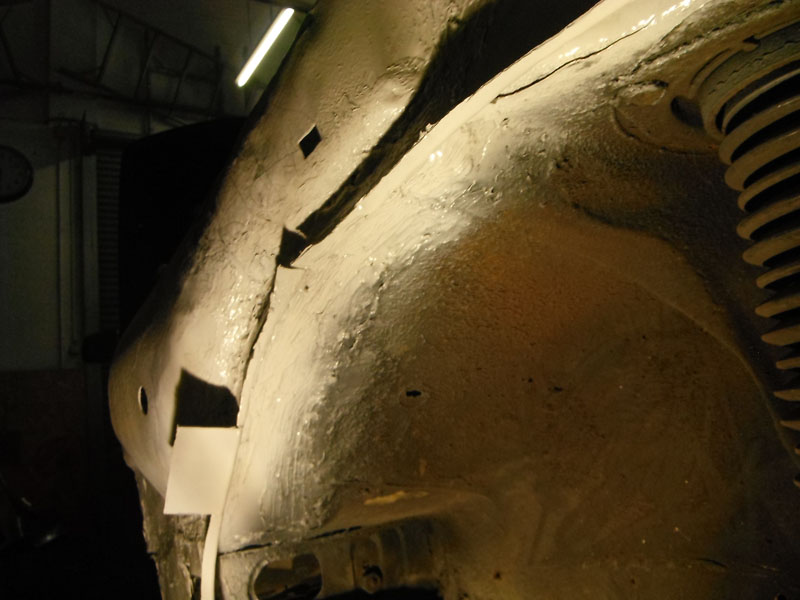
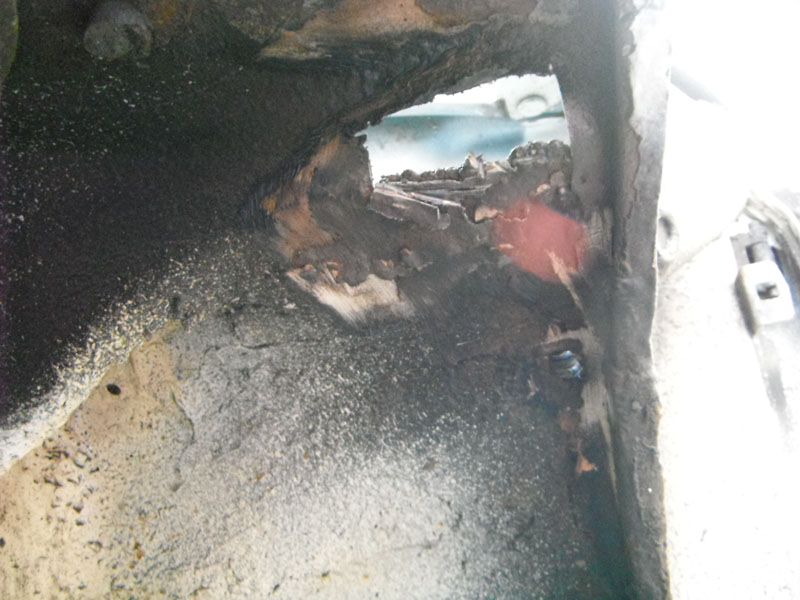
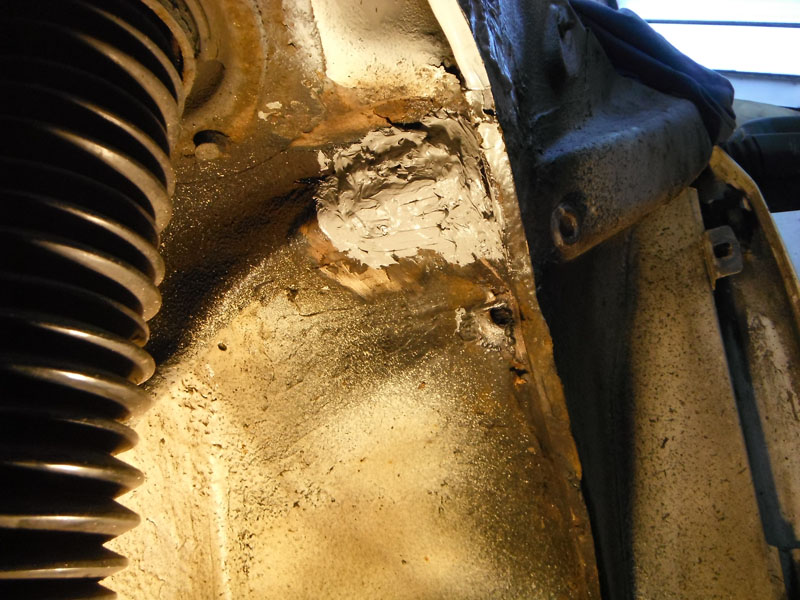
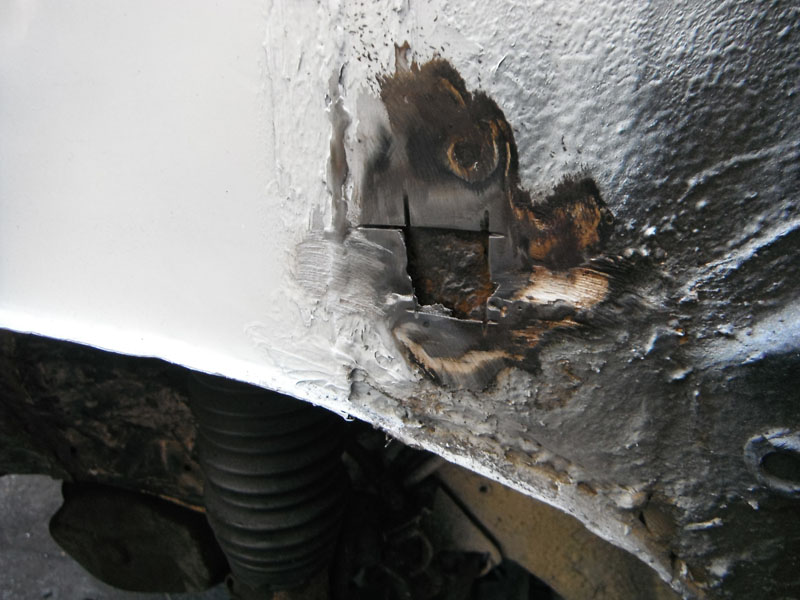
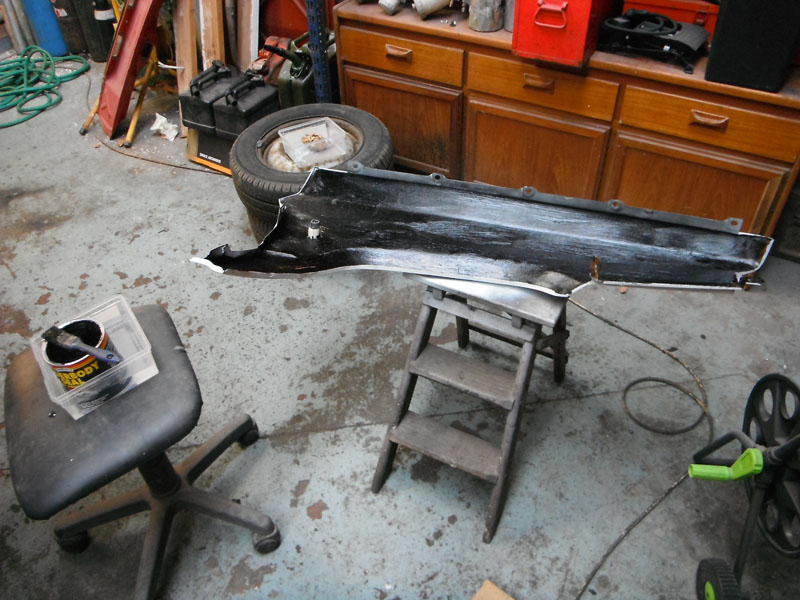
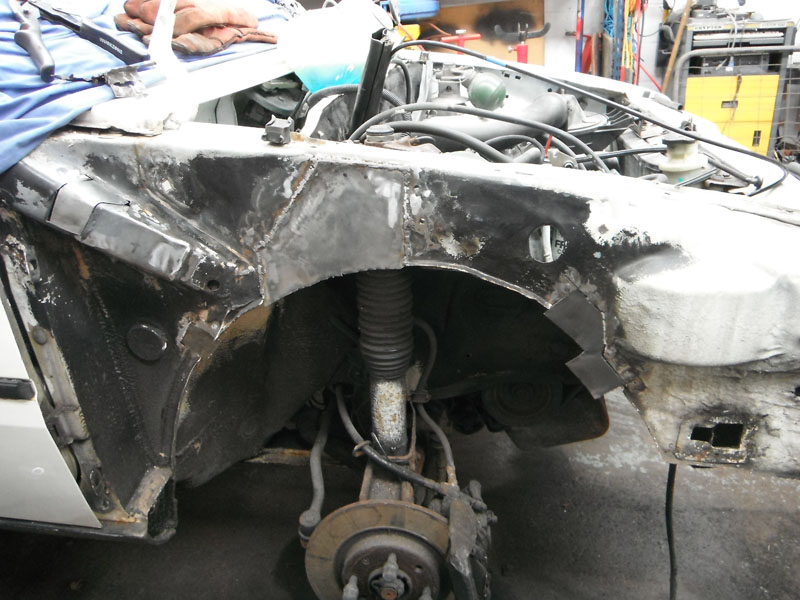
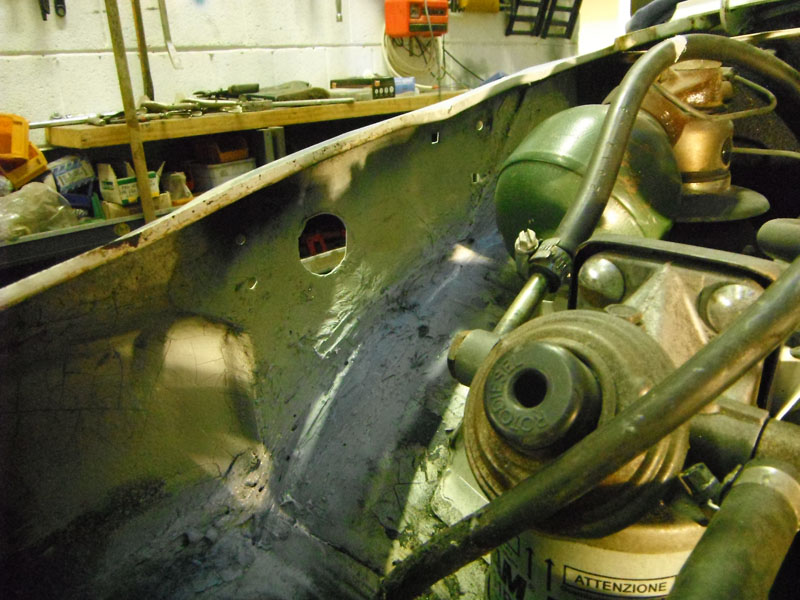
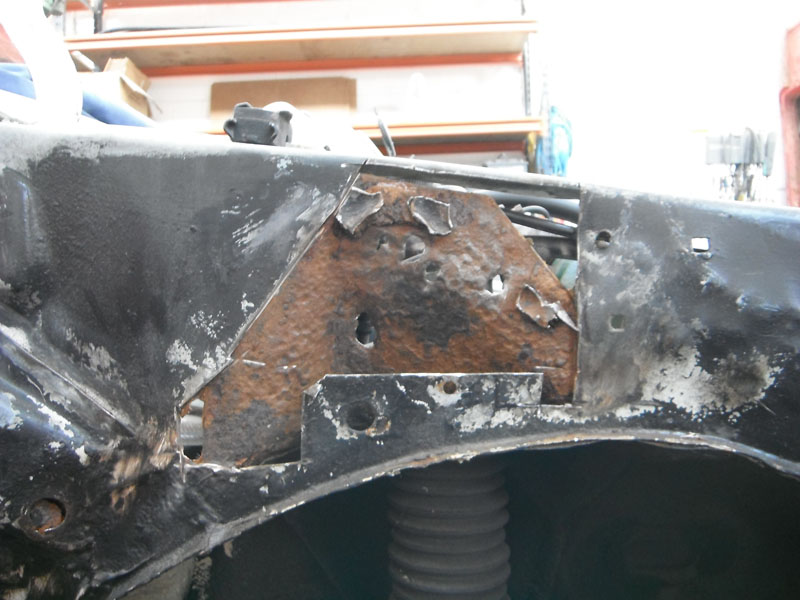
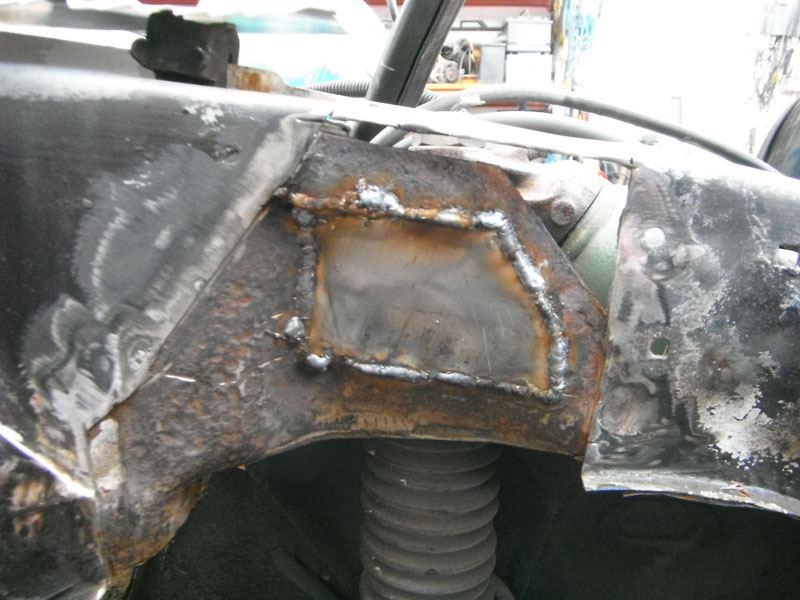
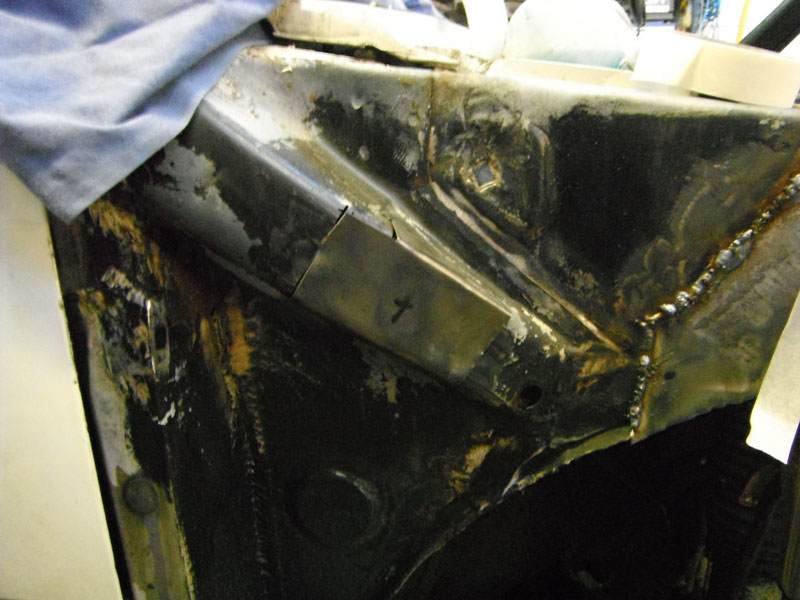
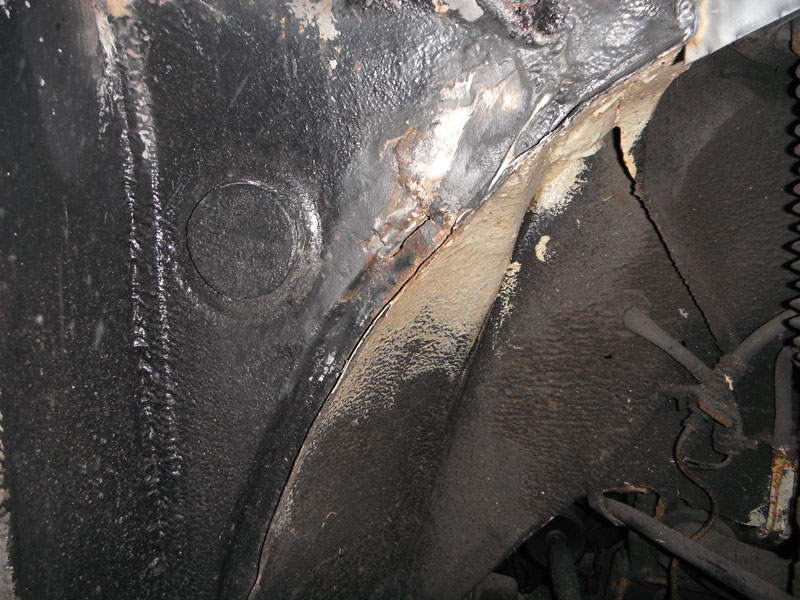
I nicked the pipe when cutting out the inner-inner wing. Although the rust was much worse on the other side, a much larger patch was required to this area on this side. The welding went really nicely too, some of the best I've ever done, and I wasn't overlap welding this since the steel is a good bit thicker than that used on the outer panels.
Image

Image

Image

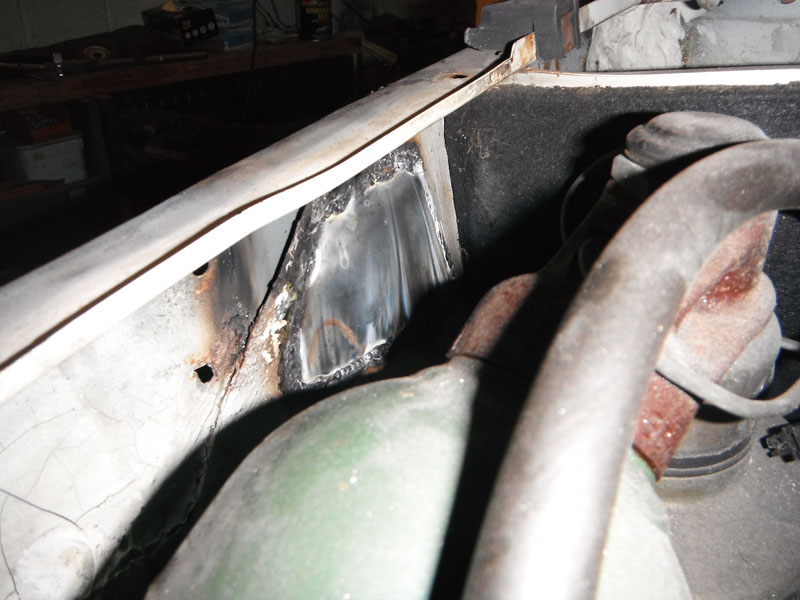
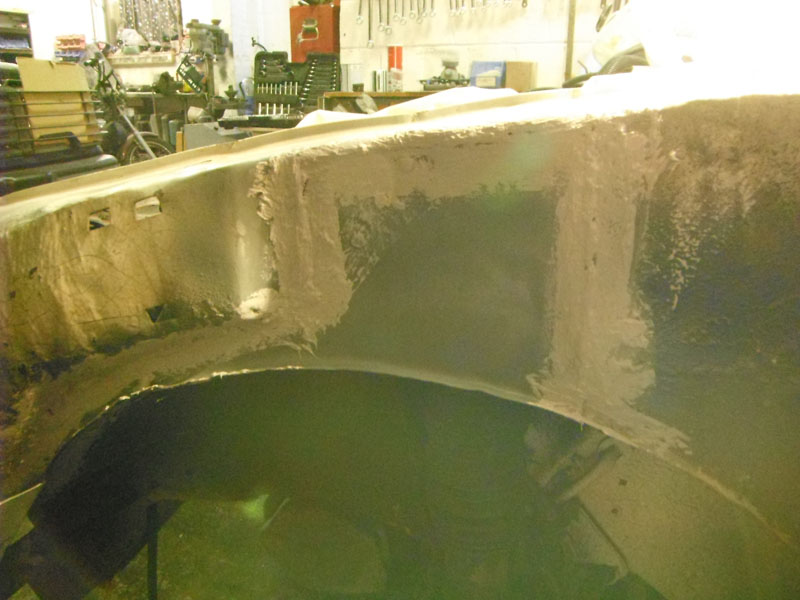
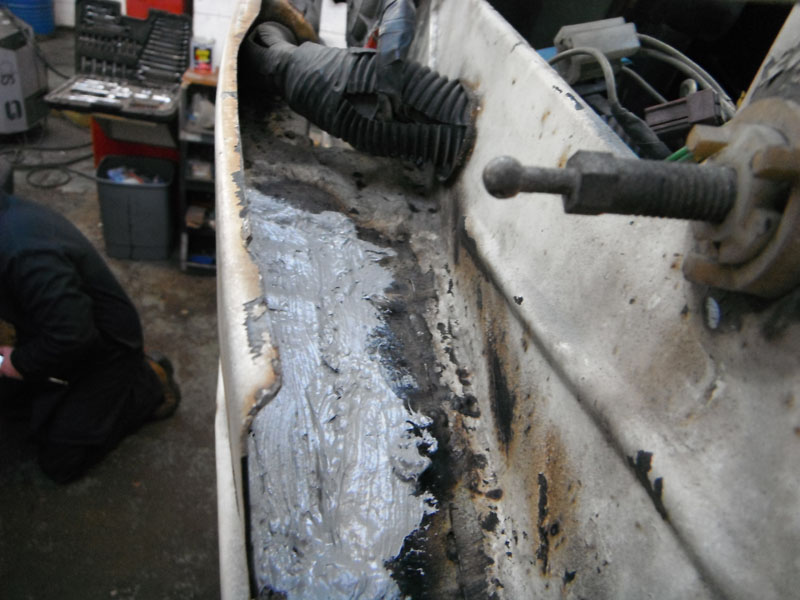
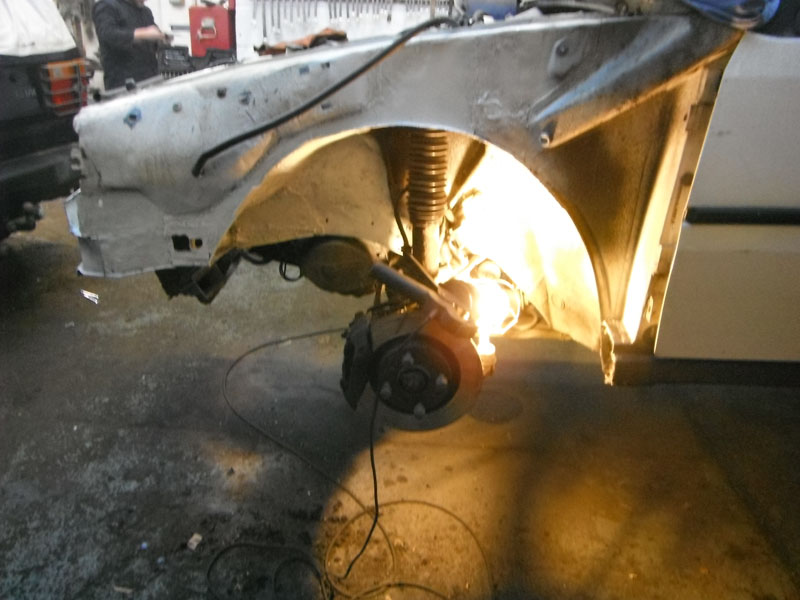
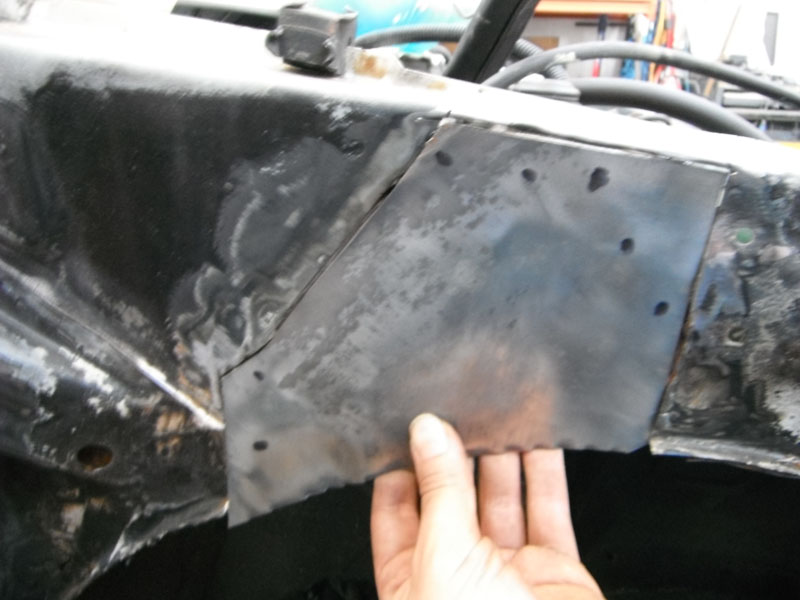
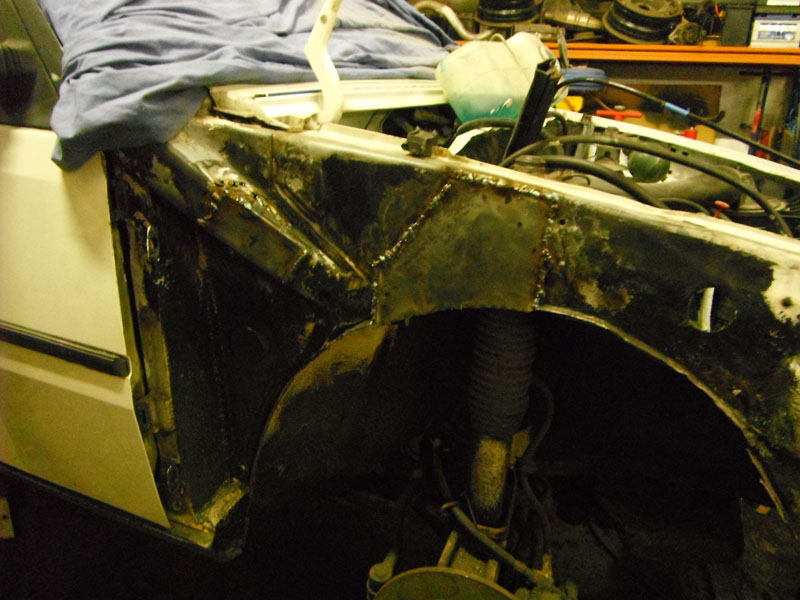
With that in and doused in relevant potions, I could get the outer panel on. Originally I was going to keep the original arch curve and put a patch in the middle until I cleaned up the piece I chopped off and decided it was too much work to repair. So a big patch again it was to be. The marker pen spots are for where to drill the spotweld holes, a job I didn't get around to doing today.
Image

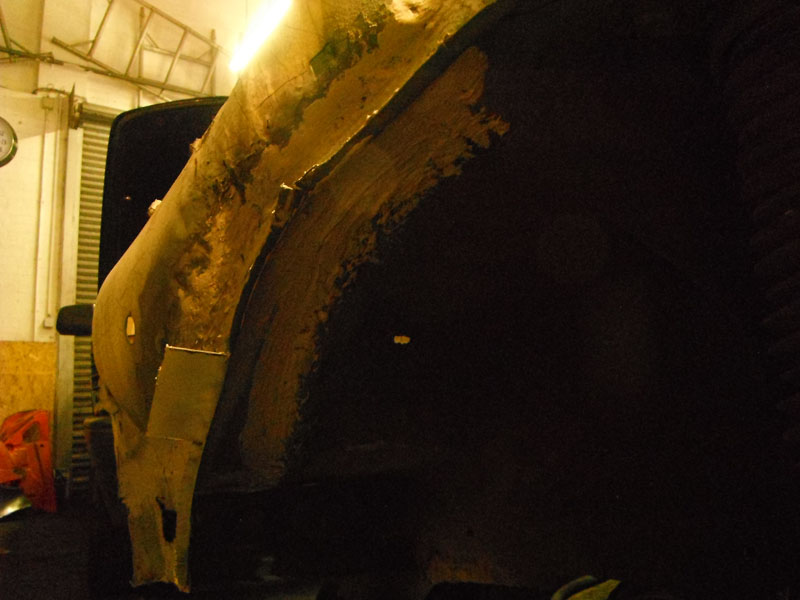
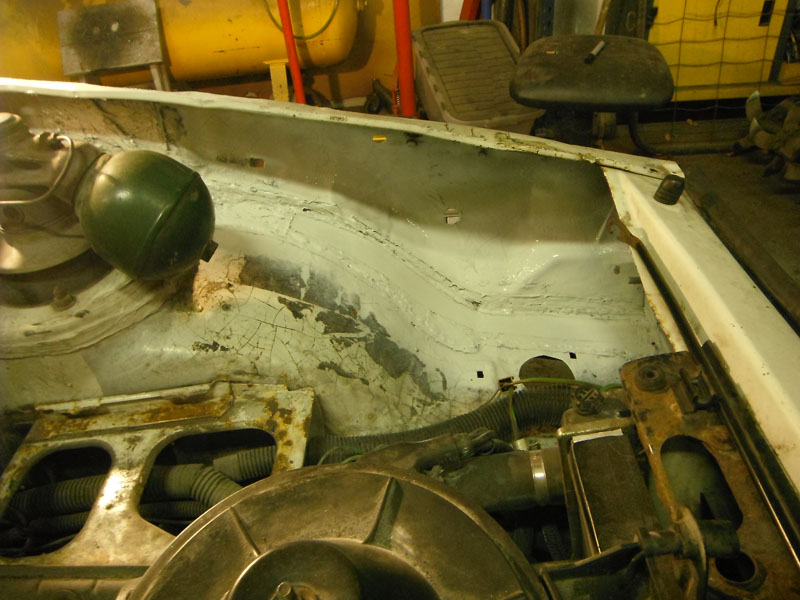
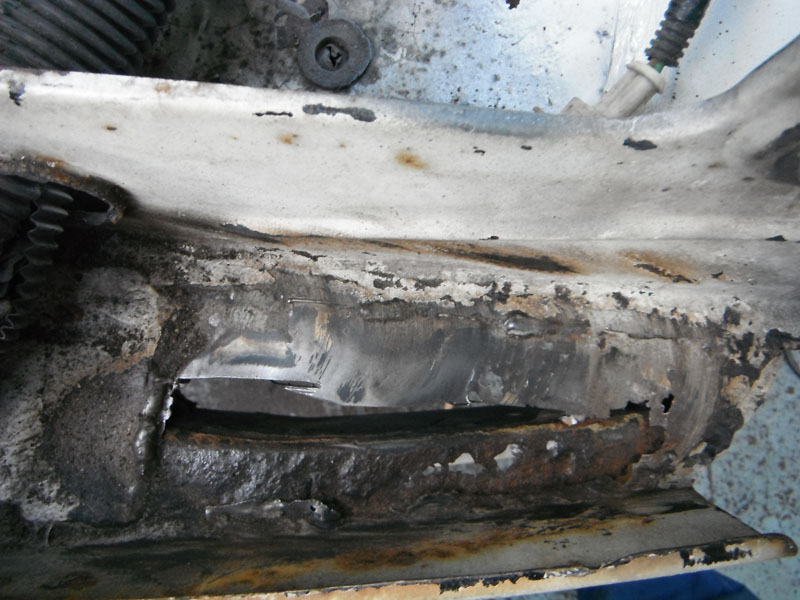
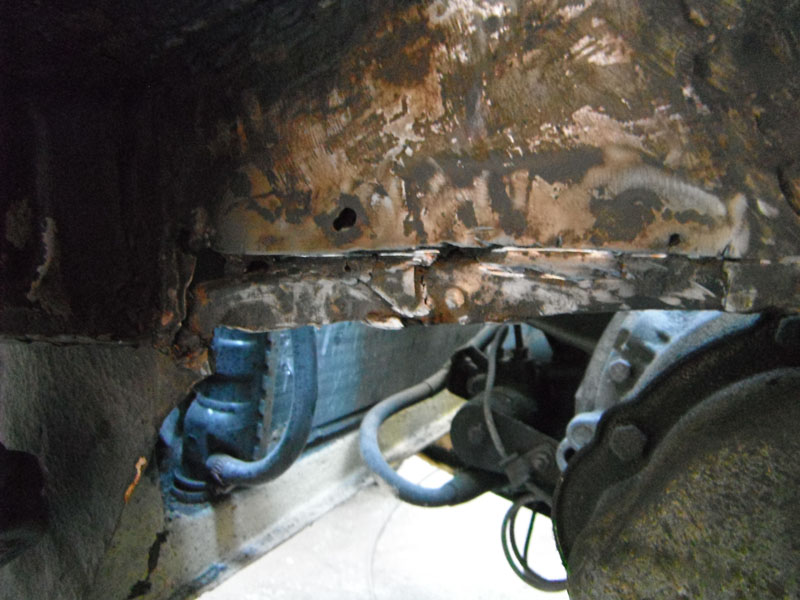
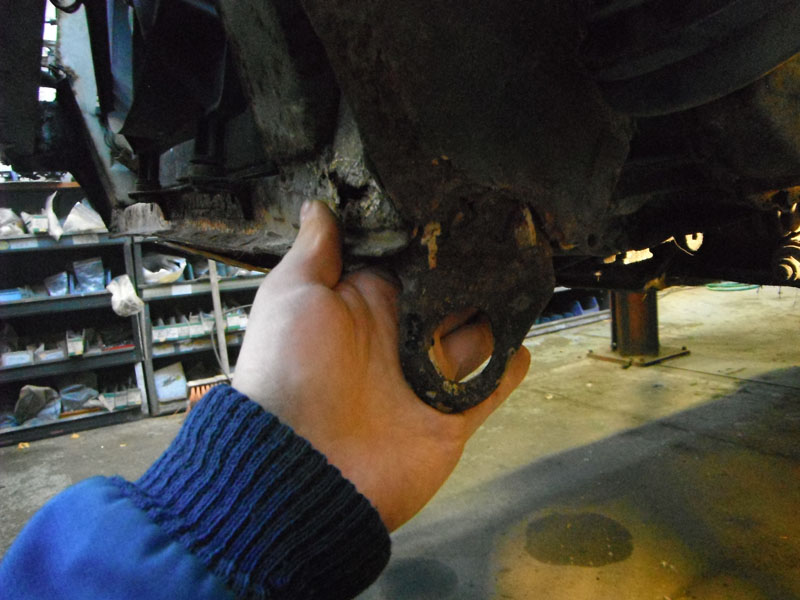
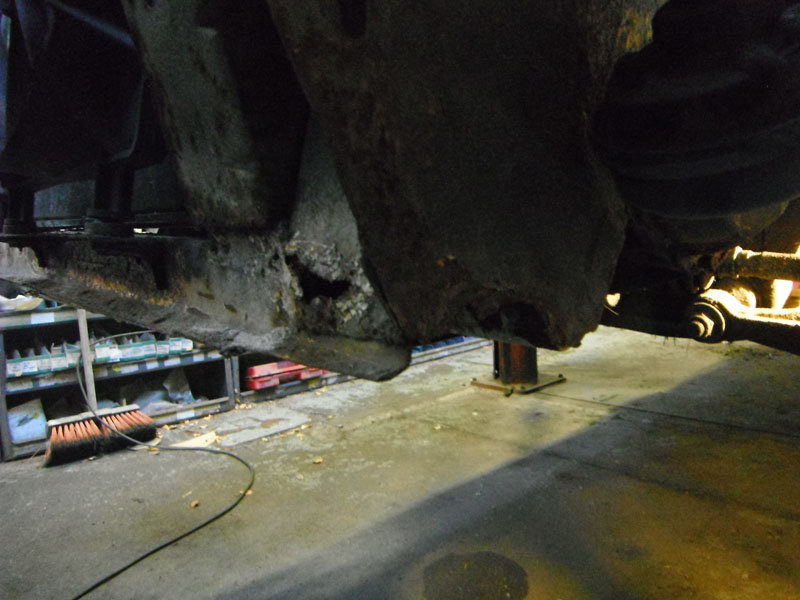
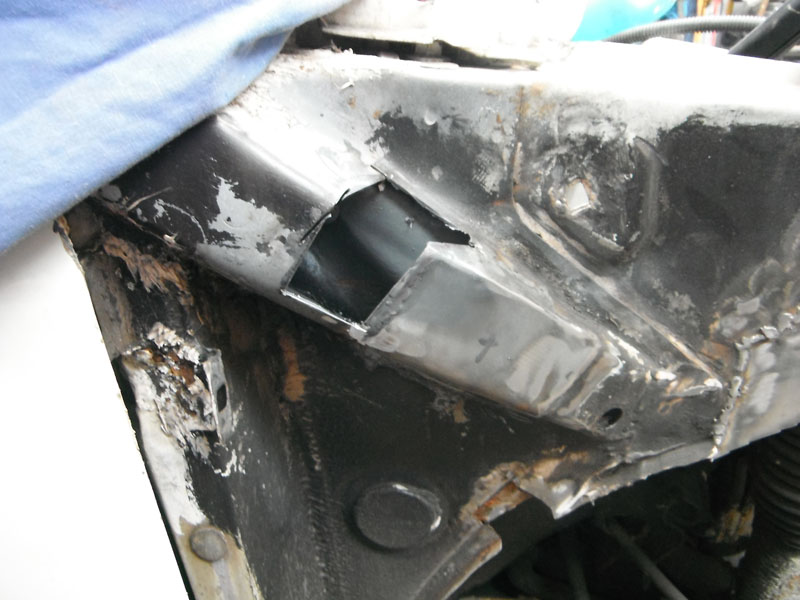
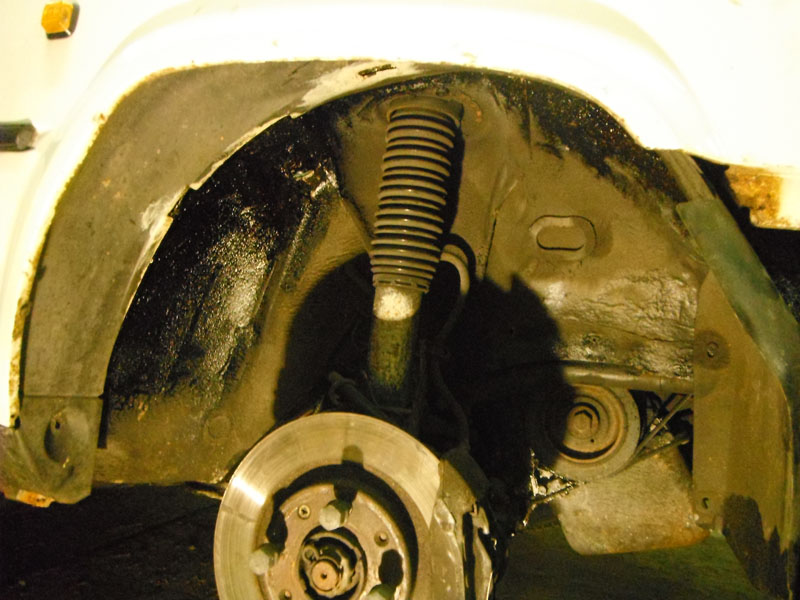
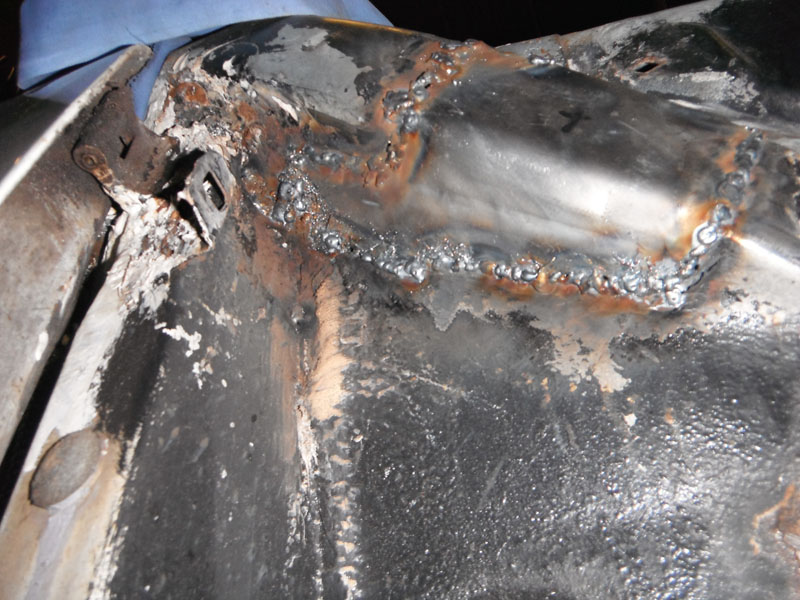
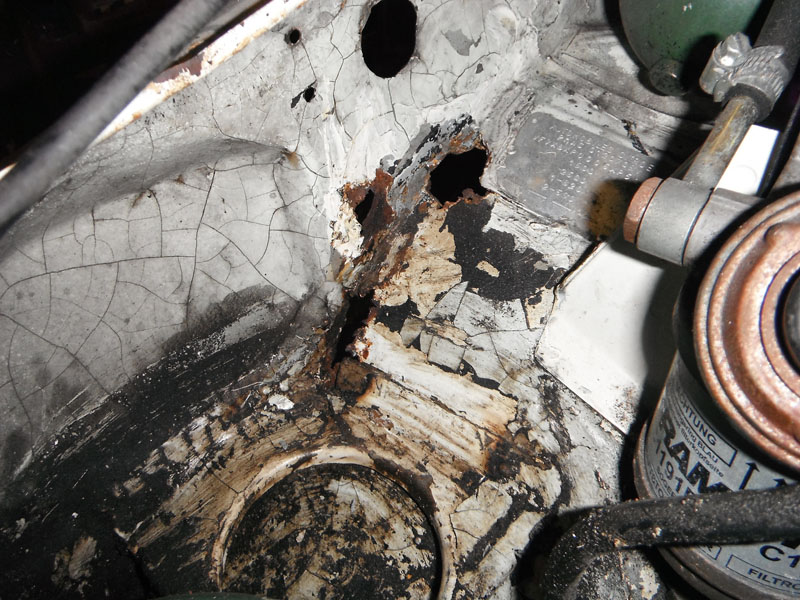
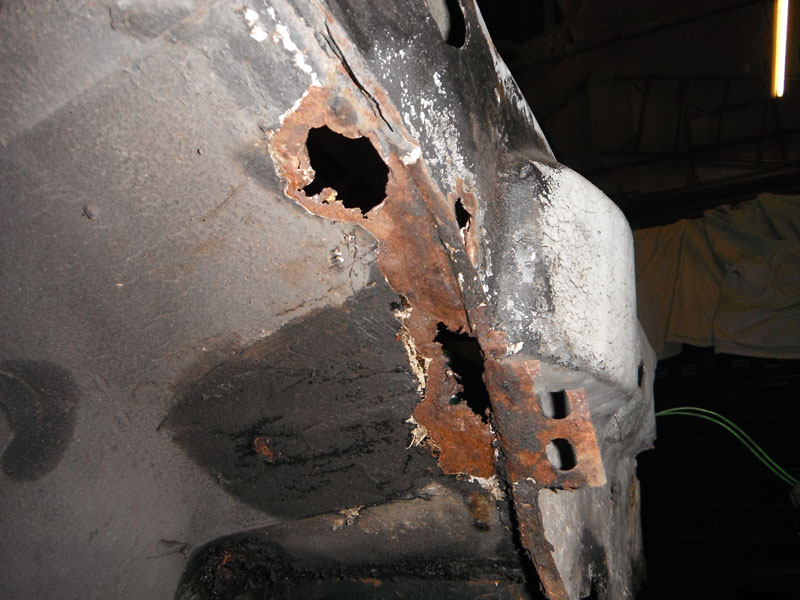
After welding in the big patch I moved on to the next most difficult area to repair while the big patch cooled down. The strengthening leg that runs from the A pillar and across the inner wing had holed in the bottom edge, and had quite a few pinholes. I cleaned it back, poked out where the metal was thin, and worked out how much I needed to chop out. It ended up needing a much larger repair than I'd anticipated.
Image

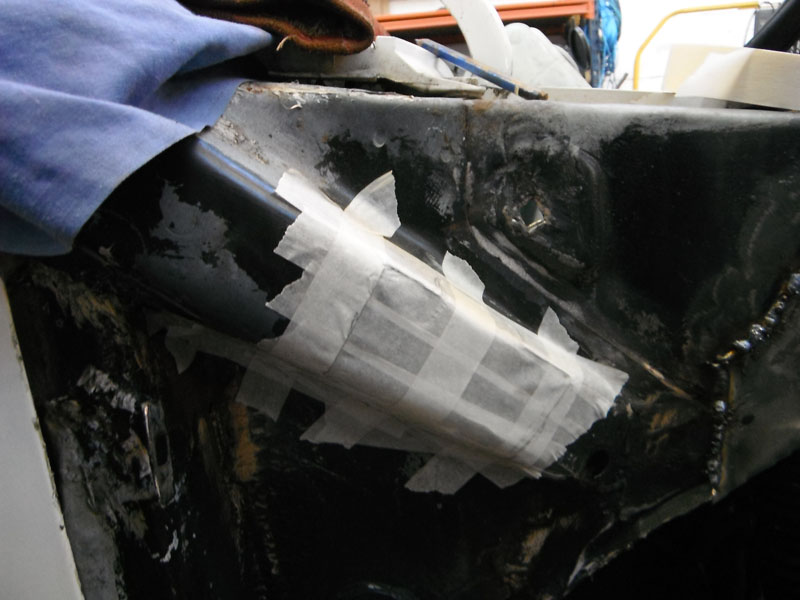
It was also a slightly peculiar shape so I employed my tried-and-tested masking tape solution to making awkward repair panels. You start by putting a border of tape around the edge of the piece, and then filling in the gap in one direction with tape. Once it's filled, run a few strips of tape in the opposing direction to tie it all together. Make a note, mental or otherwise, of which piece of tape you laid first as this will help you remove the template afterwards.
Image

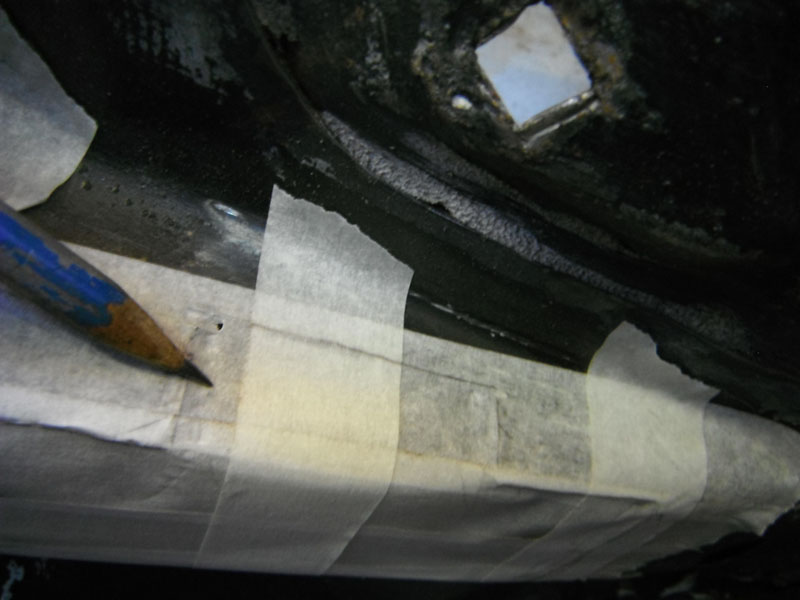
Using an old fashioned pencil, use the edge of the graphite to rub along the edges of the cut hole. A softer pencil like a 2B is better for this rather than the HB I had to hand, it's also less inclined to poke through the masking tape.
Image

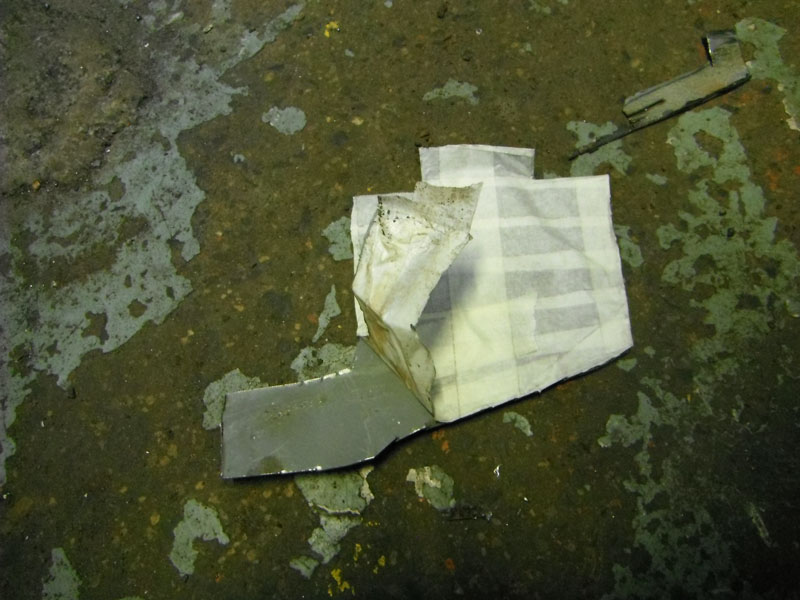
Once you've marked all the edges, simply peel the template away starting at your first piece of tape. Don't try and flatten the template out straight away and try not to handle it too much. Offer the template up to your piece of metal, if it lays flat then you can simply stick it down (providing you haven't handled it too much) and use it as a cutting template. If the template doesn't lay flat you can simply cut into it wherever it curves to help it to do so, which is particularly useful for even more complicated panels. If the tape won't stick, simply use a little more around the edges or double a piece of tape back on itself and stick that to the back of your template. Once you've done all this (it's much quicker in practice than this makes it out to be), simply cut out your metal as usual and then peel the template off.
Image

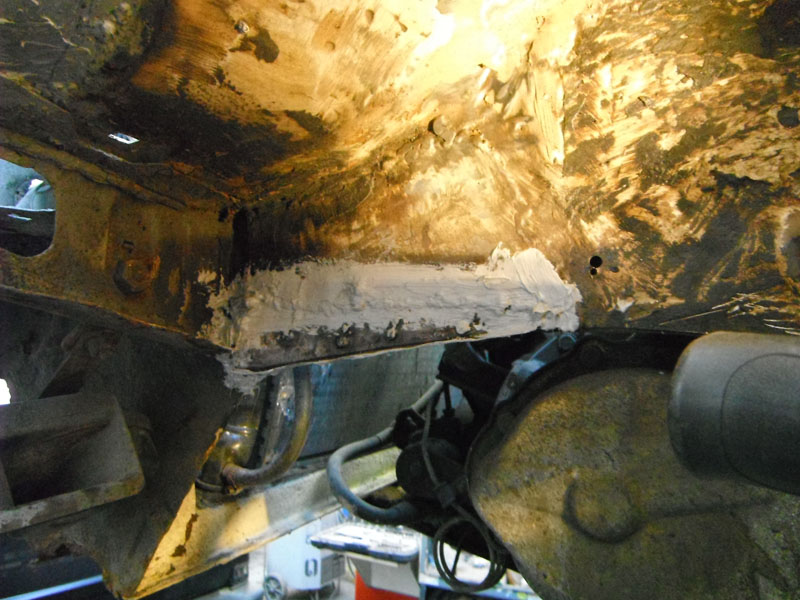
It saves so much time! Now you can fine tune the edges and add any folds required and get a much nicer finish to the job. It certainly made my life easier. For the lower bend on this panel I used a socket extension clamped in the vice with the repair panel to get a softer radiused curve while the upper bend was just done in the vice with a hammer and no former, the old fashioned way. This meant the panel matched the shapes of the original panel much better and made welding it in much easier too.
Image

Image

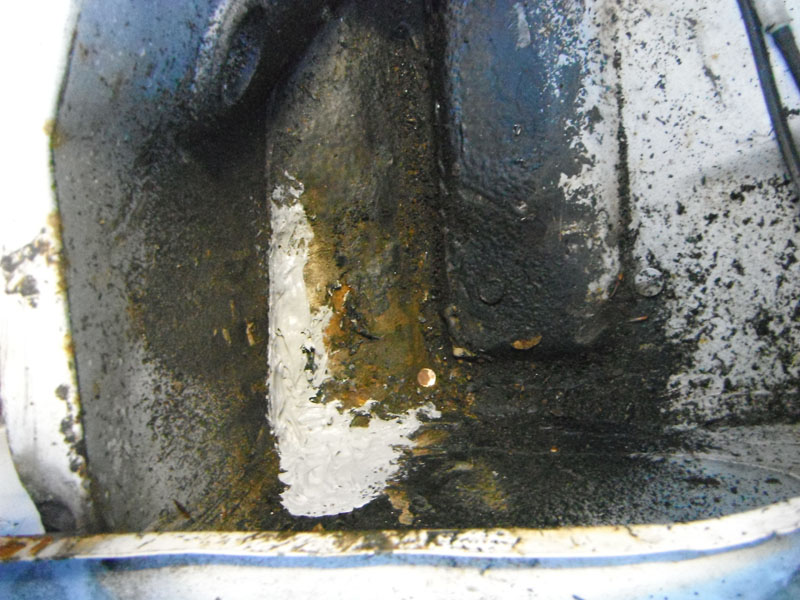
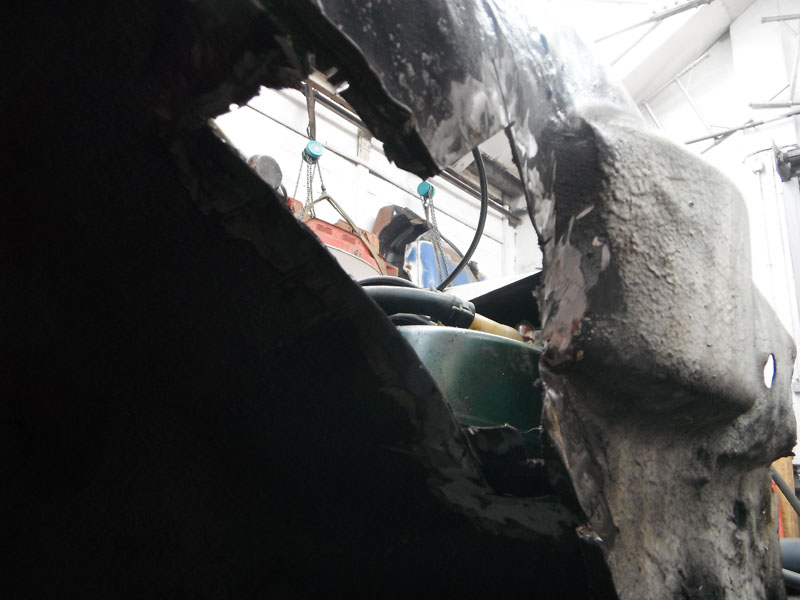
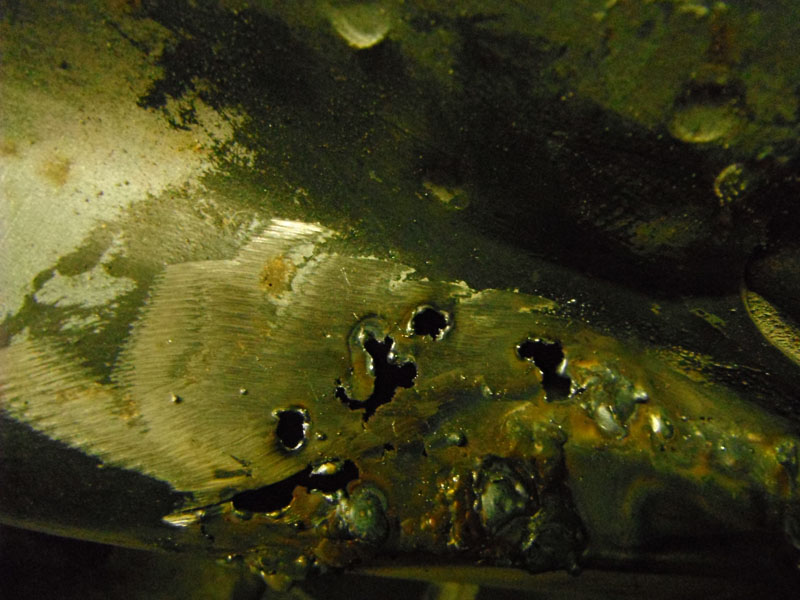
That's the last really big bit of welding done on the car (I hope). The only nuisance was when I was starting to clean up my ugly welds I noticed a couple of pinholes and went to just blob them up. Instantly blew big holes. So I'll have to let another small piece in to repair that. Underneath the strengthener where it meets the A pillar is another selection of ugly welds as I couldn't get any of the tools available into the very tight space. I'll do my best to clean it up with the tools I do have and the sealant and paint and underseal will hide the cosmetic sins afterwards.
Image

Image

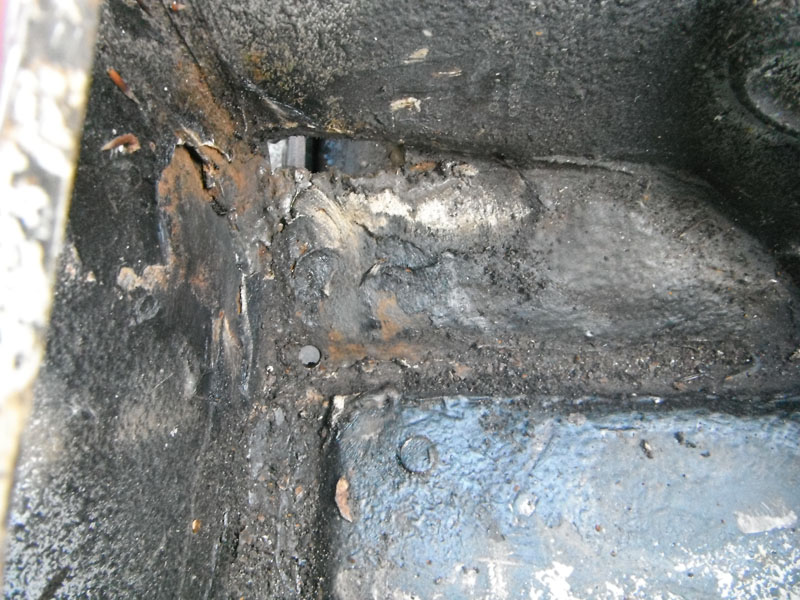
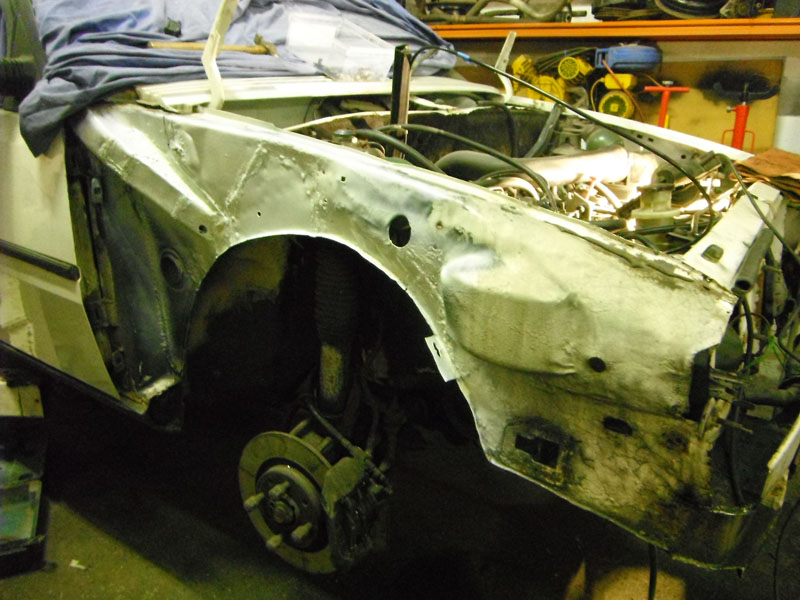
I didn't have time to do more, unfortunately, so it was just a case of assessing what's left on this side to do and it's really not a great deal. The aforementioned bit of thin metal to cut out and replace, a small piece below the strengthener, and a larger piece that I'll either do as three small patches, or one large piece, depending on how it looks once cleaned up.
Image

Image

Image

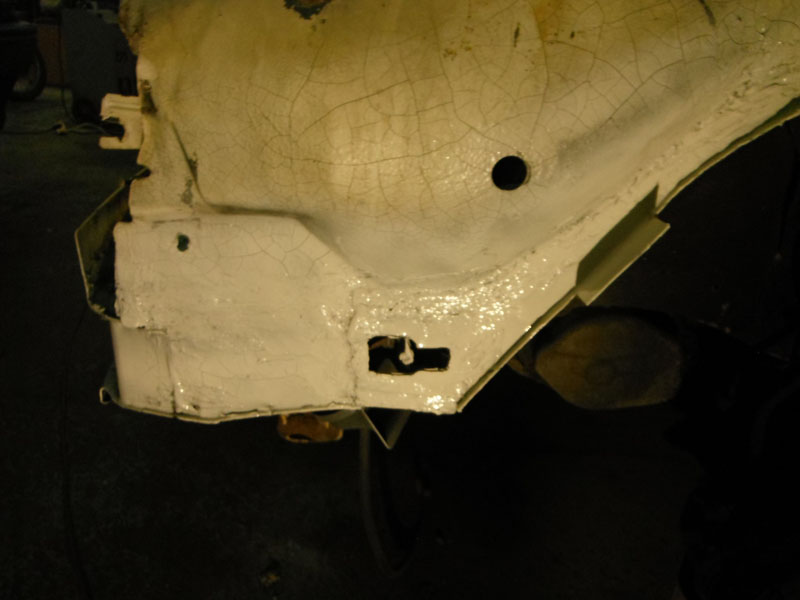
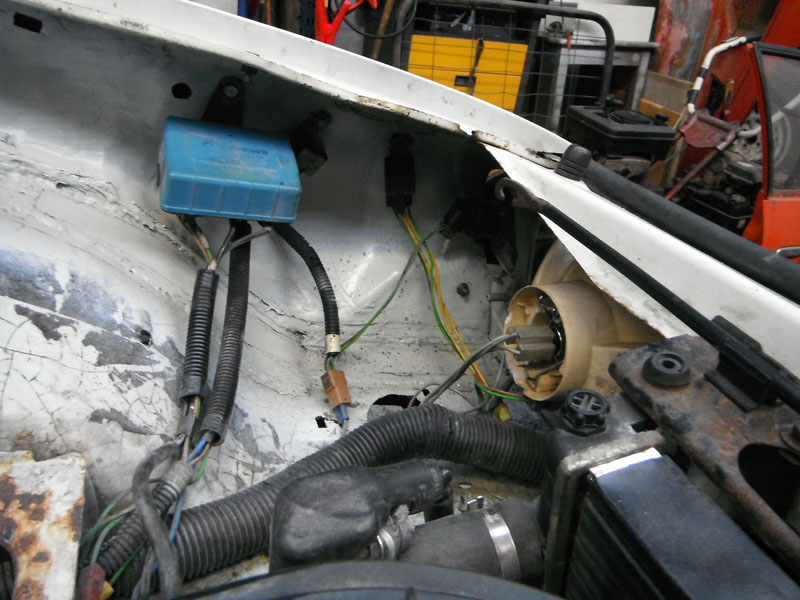
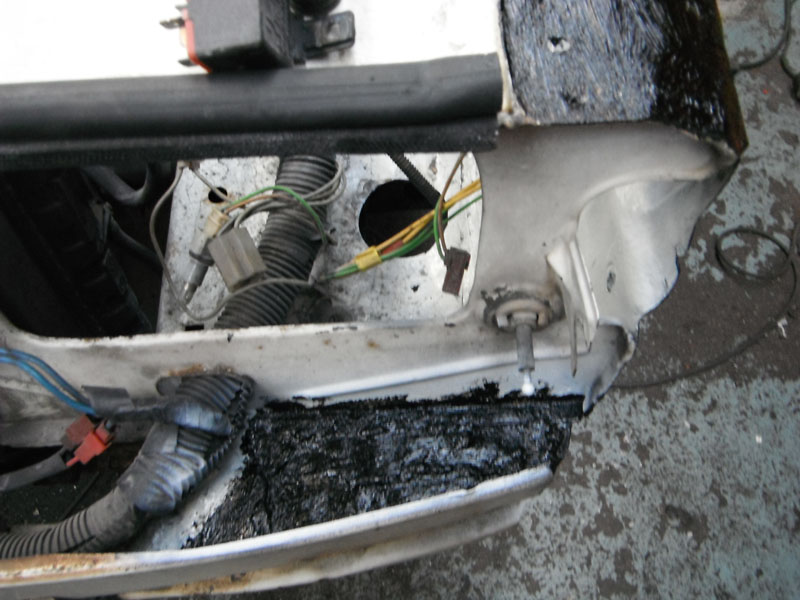
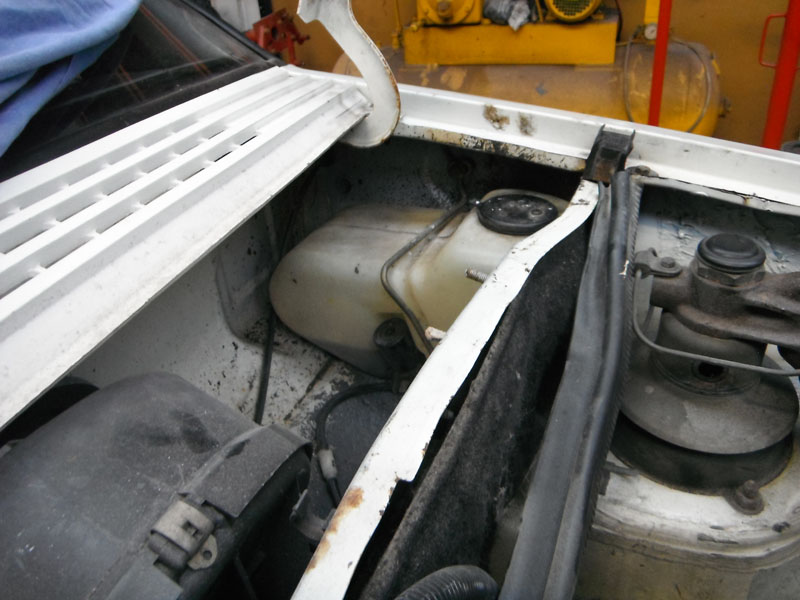
I did notice there's no drain hole under the driver's side washer bottle so I'll have to add a hole once I've finished filling up all the other holes that shouldn't be there.
User avatar
panky
BXpert
Posts: 408
Joined: Mon Jan 22, 2018 4:44 pm
Location: Widnes
My Cars: 1985 BX 19 GT (DKK), 1971 Morris Minor Traveller, 1971 Commer Auto-Sleeper, 1969 Commer Jennings Roadranger.
'88 BX GTi (a long time ago)
x 78

Re: C'est Bleriot - 1987 17RD Hatchback

Post by panky »

Great tip with the masking tape pattern. Keep up the good work
Image
User avatar
vulgalour
BXpert
Posts: 553
Joined: Mon Feb 04, 2013 11:30 am
Location: Kent
My Cars: 1980 Austin Princess 1.7 HL
1987 Citroen BX 17RD
x 105

Re: C'est Bleriot - 1987 17RD Hatchback

Post by vulgalour »

Snow and a nasty cold has meant I've not been able to get in to do any work this weekend. Over the worst of the cold now, happily, and hopefully the snow will be gone by Tuesday when I have my next bit of free time.
User avatar
vulgalour
BXpert
Posts: 553
Joined: Mon Feb 04, 2013 11:30 am
Location: Kent
My Cars: 1980 Austin Princess 1.7 HL
1987 Citroen BX 17RD
x 105

Re: C'est Bleriot - 1987 17RD Hatchback

Post by vulgalour »

Had a good long day on the BX today. First off was to attack the pinholes on the A pillar strengthener arm thing, which turned into rather a large hole to cut out because of the way the pinholes were spread out.
Image

Unsurprisingly, the inner wing need a large piece chopped out which turned out to be easier to repair than three separate patches.
Image

I also chopped out the bit below the washer bottle and drilled out the drain hole under the washer bottle that had been filled with body filler for reasons unknown.
Image

With all the pieces made up I could clean, shape, and prepare them before welding them in. The repairs went fairly smoothly for the most part and very soon I had it all seam sealed, primed, painted, and ready for underseal. I also welded in a captive nut for the washer bottle bracket since the original was missing.
Image

Image

Image

Mike helped with doing some jobs in tandem, like undersealing the back of the outer wing, which meant I could get a little bit more done in the time available. I did have the fixings for the arch liner this side so that went in much easier than the other side.
Image

On cleaning back the crossmember I found much of what looked like it would need welding didn't, it was just rust-stained paint for the most part. The only exception was the passenger side strengthener which I trimmed back and added a new piece of metal to. Very much a functional repair rather than an attractive one, especially so since this is all hidden by the bumper.
Image

With everything that needed to be in paint and underseal, Mike helped me refit the wing after I'd refitted the LHM reservoir. The lights went in very easily, as they always do.
Image

The wheel and a trim was refitted to draw a line under this corner being completed, and the bonnet was refitted with Mike's help. Happily, the car looks much more like a car again and all that work I've done you'd never know about if I hadn't reported it here. The only job I didn't get as far as doing was rivetting the identity plate back on the inner wing, an item I had to remove because the rust had just got underneath it.
Image
Kitch
Over 2k
Posts: 6417
Joined: Sun Jul 03, 2005 9:36 pm
Location: Fareham, Hants
My Cars: Too many to list
x 88
Contact:

Re: C'est Bleriot - 1987 17RD Hatchback

Post by Kitch »

Fair play to you, that's a lot of work. Had to repair those areas myself over the years. Drop us a piece in for the Citroenian if you're a member :)
One third of a three-spoke BX columnist team for the Citroenian magazine.

CCC BX registrar: The national BX register - click to submit a car!

1983(A) 16TRS (Rouge Valleunga)
1990(H) 16Valve (Rouge Furio)
User avatar
vulgalour
BXpert
Posts: 553
Joined: Mon Feb 04, 2013 11:30 am
Location: Kent
My Cars: 1980 Austin Princess 1.7 HL
1987 Citroen BX 17RD
x 105

Re: C'est Bleriot - 1987 17RD Hatchback

Post by vulgalour »

I'm not signed up to any Citroen/BX clubs at the moment, just a content provider on the forums. I'm happy for you to use any of the info and pics in this thread providing there's credit given for what you use.

I'm really glad that I bought this one off Dean, he's my idea of an ideal seller since he was honest about the car's condition and directed me to where I needed to do the work. You don't often seem to get that.
Warren Nel
Confirmed BX'er
Posts: 49
Joined: Thu Dec 20, 2018 2:17 pm
Location: Tonbridge
My Cars: Citroën C4 Grand Picasso

Previous cars
Peugeot 806 TD
Peugeot 309 TD
Ford Fiesta 1.1
Mazda 323 mk1
Nissan Micra mk1
x 2
Contact:

Re: C'est Bleriot - 1987 17RD Hatchback

Post by Warren Nel »

Brilliant work. I'm very impressed.
Post Reply